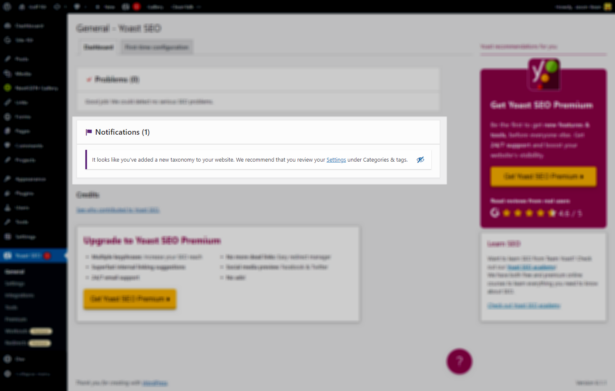
• Skip to primary navigation
  • Skip to main content
  • Skip to primary sidebar
  • Skip to footer

Bnpositive's Blog

  • Home
  • Blog
  • About Me
  • Contact Me
  • FREE Local SEO Audit
You are here: Home / Archives for WordPress

WordPress

03/26/2021 By Jason Bean Leave a Comment

How to Create an Animated Slide In Effect on a Divi Column

Divi Row Column Slide-In Animation Effect

Since I just finished creating this little guide for a client, I thought I'd publish on my site as well as I'm sure it could probably help someone else in the future.

If you're a Divi theme user, then you know there's a load of features and power available within the interface, sometimes the challenge can just be where to go to do the things you want to do. In this case, I was working on recreating a theme that someone had built. In there process they had ripped out all the benefits of using WordPress and buried code and functionality deep into the template files where nothing was easily accessible or manageable. In their design, the site appeared to be a continually scrolling website but scrolling right-to-left, not top-to-bottom. To keep that same feel and experience for the visitor, I created an animation effect for the main content column in the layout to appear like it slides in from the right when each page loads.

Now, how and where did I go in Divi to do it? Here we go!

First I used the Divi Theme Builder controls to build me a layout that consisted of a simple sidebar on the left and a wide content module on the right. That was achieved by adding a single Divi row container into the layout with a simple 2 column layout inside of it.

Follow these simple steps to animate the entire right-hand column of the layout:

Step 1: Access the Divi Theme Builder and Row Settings Control

You can access the Divi Theme Builder from the Divi section available in the main left-hand menu within the standard WordPress Admin Dashboard. Hover over the green row container until it's control module displays and click on the little gear icon

Step 2: Access the Column Settings Controls

When you access the Row Settings controls a new modular window displays with the columns displayed, just click on the gear icon for the 2nd column displayed, which then opens another modular window.

Step 3: Navigate to the Design Tab of the Column

As you're aware, each module, container, row, section in Divi normally has three tabs across the top for managing all the settings available (Content, Design & Advanced). We want to access the "Design" tab, so click on it.

Step 4: Scroll Down to the Animation Section

At the bottom of the Design controls is a section labeled "Animation". Within this section are all the controls you need to make your slide-in effect happen. Once you get in there you'll see, as usual with Divi, you have a plethora of controls and modifiers to take advantage of in your design.

In my case, the client was very pleased. Was not familiar with Divi, but seemed to be very impressed with the organization and ease of which managing content and manipulating features and controls were within the theme. The other thing that I thought was interesting, and surprisingly quite a challenge with this project was the broad range of responsiveness that was needed within the design. It stretches the full width of any monitor and resolution to fill the available space, but also shrinks down and displays well for mobile phones and tablets.

Filed Under: Technology Tagged With: animation, Divi, howto, tutorial, web design, WordPress

06/27/2017 By Jason Bean 2 Comments

Small Business Tips: Easy Ways to Look More Professional

Business Travelers on Escalator

As a small business, appearance is everything. Sure, customer service and the product provided is integral to succeeding, but first impressions count – as it does in life in general.

With that in mind, you should be searching for all of the ways that will make your business look as professional and smart as possible. You might already have an attractive logo and optimized social media accounts, but there is much more that can be done. Also, don’t think that looking more professional is all about aesthetics, either.

So, with all that considered, read on for some top tips to take your small business to the next level.

Use a dedicated phone and PO Box

Even though businesses are going further and further towards being based on primarily on the internet, this doesn’t mean you should dismiss the option of using a dedicated phone line. Plus, some people still like to chat the old-fashioned way, and this also means you don’t have to hand out your home phone number!

In a similar vein, looking into a PO Box is also something you should contemplate if you are expecting product returns and such.

Get your own domain and email

It might seem apparent, but a noticeable amount of small businesses simply rely on social media as their online presence. Well, that’s not exactly the ideal first port of call for those searching for your company – especially if said potential customers do not have any social media accounts for themselves.

As a result, you should definitely look towards investing in your own domain/website. This will also provide you with your own business email, which helps make you look more professional when contacting others.

Make your website look the part

15 years ago, you could have been forgiven for producing a website that was little more than a wall of text with a gradient background. These days, however, you have all the tools to craft a fancy-looking website without the need of a specialist web developer.

In terms of creating your own website, WordPress is the ideal starter kit for beginners. Not only is it easy to use; it comes along with essentially an endless amount of customizable options, and – thanks in part to it being the most popular web development tool on the market – there is also a wealth of helpful guides out there should you get stuck at any point. 

Top tip: make sure to use high-quality images. Your site could have a responsive and fresh framework, but pictures will draw people in more than any efficient functionality could. 

Smarten up your packaging

Although it might be overlooked as something that is not too important, the packaging for your products – should you be selling physical goods of course – leaves an impression on your customers.

Obviously, the packaging should keep all products sufficiently protected during transit, but its appearance also has plenty of scope for improvement. Address labels via a label maker is highly recommended, with LabelCity.com being one place that offers a wide range of such useful devices. Additional embellishments to your packaging include your logo via a stamp and supplying a leaflet with discount codes.

Planning for the Future

If you're a small business owner, you're probably always thinking about the future. Whether that's tomorrow, next week or 5 years down the road. Tony Robbins just released a 2020 Business Owner Mindset Report that shows most business owners believe they'll figure out what it's going to take to weather the future storms being faced, even if they don't have all the answers right now. I believe that's the key to successful business leadership. A positive mindset and understanding the need to be flexible and agile in both finding solutions and then implementing those solutions once you've identified the ones that are going to work for you and your organization.

Filed Under: Business & Career Tagged With: business plans, first impressions, future, image, marketing, perception, planning, professional, website, WordPress

12/02/2015 By Jason Bean Leave a Comment

Image Optimization? What Do You Mean

Image optimization seems to be one of those simple steps that's frequently just ignored or not understood fully by many individuals and businesses active online. I have a number of friends and family members that I help them with their websites, social media and online marketing efforts. After receiving a recent email distribution from my brother I thought I'd take the opportunity to share with you some of the suggestions I gave him about image optimization in his recent usage.

Image Optimization Example

The first step to really optimizing an image is to resize it to the size you're going to be displaying it at on your website or in your email newsletter. Granted these days with broadband Internet pipes and fiber optic connections this isn't as noticeable as it once was. But I can still usually immediately identify a non-optimized image when I see it slowly come into view after the rest of the content has already loaded.

In the example above, the image in the email was displayed at just under 200 pixels in width. But the actual image file used remained at its larger dimensions of over 1100 pixels in width. This is also frequently seen when people take photos from their phone or digital camera and just upload them directly in the original resolution and formatting size.

Image Optimization by File Type

The second simple step to image optimization is to save them in the best format option for the type of media graphic.

WordPress.jpgGenerally photographic images should always be saved as a .JPG file like the image in this post example.

This would also include any graphics that have smooth gradients or variations of colors. Like in the WordPress logo example to the right. This smooth transition from the lighter blue to the darker blue should be handled by saving as a .JPG or .PNG file.

For simple, limited color line graphics like logos and such, generally you'll prefer to use .GIF as file format as shown in the Amazon logo below. Bold blocks of solid color.

Amazon.com

The PNG format is very popular and can be used for both graphics and photos. Quality will be good but generally the file size will be significantly higher without compression compared to the other options available.

In the example above with the photo, it was displayed in the email in the smaller dimensions of the color photo (195 x 104 pixels). With image optimization by resizing the photo first and saving it as a .JPG, the file size would have been a little over 9Kb instead of 1.34MB for the original, full-sized PNG file that was used. That's a 99% decrease in file size!

Even if the original photo would have been saved in the same dimensions but only as a .JPG instead of .PNG, it would have been saving almost a 3rd of the file size: 504kb instead of 1.35MB

So, think about your images before you just pop them into your website or email. Be sure to also keep a copy of your original sized image so you can always come back to the full resolution version if necessary in the future. Perhaps in a future post I'll also talk about optimizing your image file names before you upload them as well.

Filed Under: Featured, Technology Tagged With: email, file format, file size, gif, image files, image formats, image optimization, jpg, photos, png, resolution, WordPress

  • Go to page 1
  • Go to page 2
  • Go to page 3
  • Go to page 4
  • Go to Next Page »

Primary Sidebar

Recent Posts

Entrepreneur w/ Laptop at a Table

Entrepreneurs, Now IS the Best Time for that New Startup

We are all living with the implications of the pandemic — it has made us cautious and even wary of … [Read More...] about Entrepreneurs, Now IS the Best Time for that New Startup

Divi Row Column Slide-In Animation Effect

How to Create an Animated Slide In Effect on a Divi Column

Since I just finished creating this little guide for a client, I thought I'd publish on my site as … [Read More...] about How to Create an Animated Slide In Effect on a Divi Column

Person Studying at Laptop

Why Studying Is The Best Thing You Can Do While Unemployed

Covid-19 increased unemployment in many countries. The United States suffered from business … [Read More...] about Why Studying Is The Best Thing You Can Do While Unemployed

RSS Positively Indy

  • Video Multimedia Salute to Veterans on Indianapolis Monument Circle
  • Money Tasks to Remember for the Summer

RSS Mission Notes | Faith & Culture

  • You Were Created to Hear God’s Voice
  • Remembering THE Champion… Carman

RSS Homeschool Daddy

  • Listening and Understanding on a Budget: Helping Teens Make Healthy Decisions
  • Tips and Resources for Being the Best Parent You Can Be

Premium WordPress Themes from InkThemes.com
The Bouqs - Premium Farm Direct Flowers

Footer

  • Clients
  • Archives
  • Advertising Disclosure
  • Domain For Sale
  • Comment Policy

Copyright © 2021 · Executive Pro On Genesis Framework · WordPress · Log in